Hello everyone!
I am here with Kat Scrappiness, Inc., I am sharing two cards featuring the newly released stamp set called Summer Quokka and two of the mini slimline dies called Postage Stamp Edge and the Tri-Frame. There are 8 new slimline dies that have been added to the mini slimline collection. Be sure to visit the store and see the collection.If you have not had a chance to visit the clearance section in the store, there are some great buy, you can find it here.

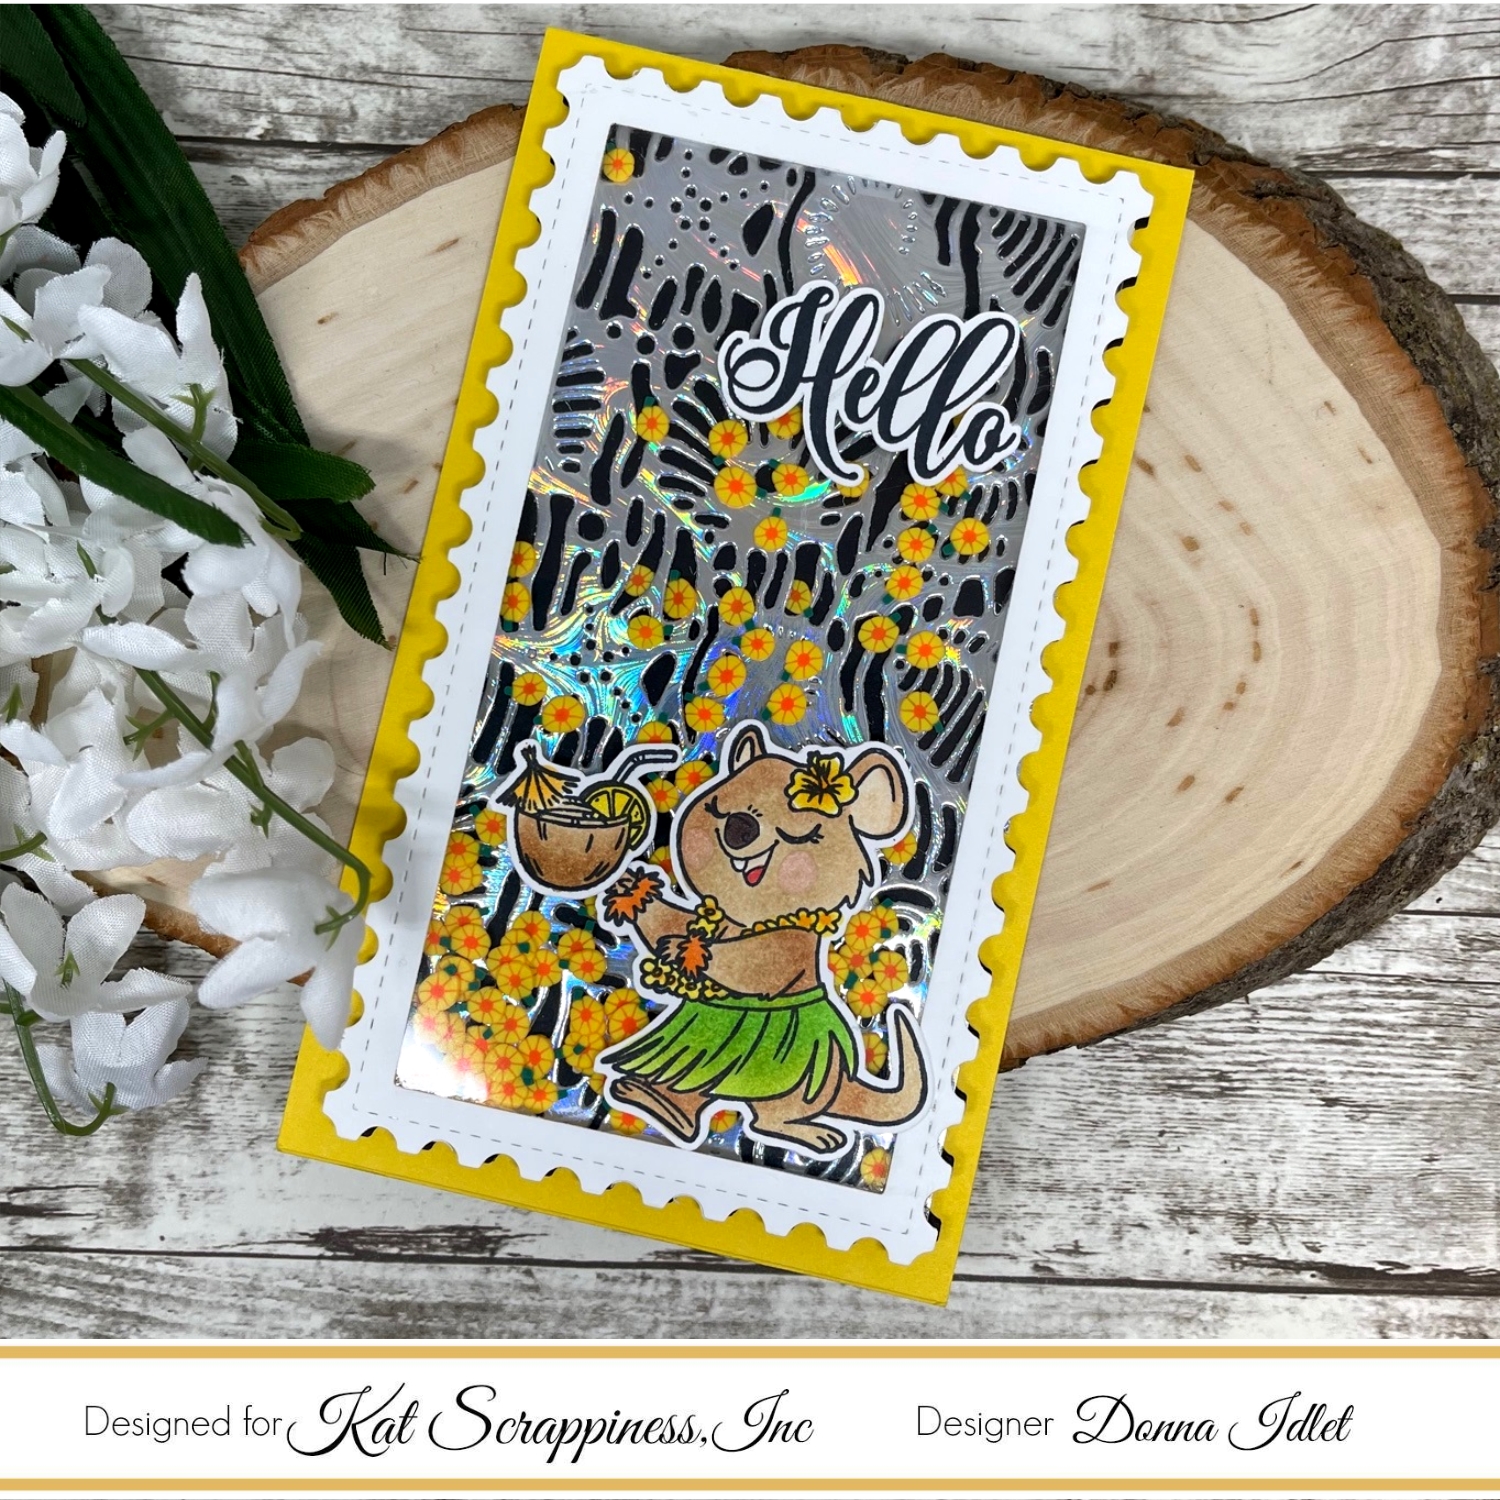
Here is how I created my shaker card:
1. I cut the base card at 6 x 3 1/2.
2. I then die cut the Kat Scrappiness Mini Slimline Postage Stamp Edge.
3. I adhered Kat Scrappiness Mini Slimline Acetate Sheets to the Mini Slimline Postage Stamp Edge with liquid glue. I added some foam tape to the back of the postage stamp edge die and acetate. I die cut the Kat Scrappiness Under The Sea Coverplate Die. I added the Kat Scrappiness Yellow Daisies Sprinkles inside and added the Under the Sea Coverplate and black card stock to close the shaker.
4. I added the shaker part of the card to the base.
5. I stamped and colored the images with copics from the Kat Scrappiness Summer Quokka and added them to the front of the card.
6. I added the Hello sentiment from the Friendship Greetings stamp set.
My second card features the Kat Scrappiness Starlights Jewels and Starlights Bright slimline papers, the mini slimline Tri-Frame, Light Up The Night Sprinkles and Happy Birthday Brush Script Sentiment.

Here is how I created this card:
1. I cut the base card at 6 x 3 1/2.
2. I then cut half inch strips from the Starlights Jewels and Starlights Bright slimline paper and adhered them to some card stock. I then used the mini slimline Tri-Frame to cut the layer for the card. I adhered the frame to the base of the card and then used some foam tape to pop the middle up onto the base of the card.
3. I then die cut the Happy Birthday Brush Script Sentiment in black and white and then adhered it to the card.
4. I finished my card off by adding the stars from the Light Up The Night Sprinkles.
Here’s the list of supplies I used on the card above:
Thank you so much for stopping by, please visit Kat Scrappiness blog for more inspiration.