ThermOWeb, Gina K. Designs and Unity Stamps Instagram Hop - New Release Deco Foil Adhesive Transfer

Wednesday, March 30, 2022

Hello everyone!

I am here today sharing a NEW product from ThermOWeb, Gina K. Designs,  and Unity Stamps!  This product is amazing, it is called  Deco Foil Adhesive Transfer.  These sheets have been printed on acetate and can be used to foil with your laminator or die cutting machine.  You will love the results using your foil,  die cutting machine and laminator!

ThermOWeb, Gina K. Designs and Unity Designers have joined together for an Instagram Hop to show off these new products. You can start the Instagram hop here, be sure to join. What's a hop without some prizes? Each company will be giving away 2 $50 Gift Cards to their stores…that’s 6 chances to win! The hop will end on Tuesday, April 5th at 11:59 pm CST. Winners will be announced on the 7th on Gina K. and ThermOWeb’s Instagrams.

Here are my cards for your inspiration:


Here is how I created my first card using Deco Foil Adhesive Transfer Designs - Follow Your Dreams
  • A2 Top Fold Card Base: 4 1/4" x 5 1/2" (4 1/4" x 11", scored at 5 1/2") 
  • Used GKD Master Layouts 1 to create the Layers
  • Top Layer ink blended GKD Floral Stencil in Lovely Lavender, Jelly Bean Green
  • Added the Humming Bird Adhesive Transfer onto the card and ran it though my die cutting machine, then cut a piece of the Rainbow Deco Foil, placed it onto the area where I transferred the Humming Bird and ran it through the laminator. 
  • Die cut the GKD Smile die using ThermOWeb Toner Sheet and then foiled the word with Deco Foil Gold.
  • Assembled the card. 

My second card is a mini slimline I created using Deco Foil Adhesive Transfer Designs - Follow Your Dreams.

  • Mini Slimline card base measuring  3 1/2" x 6".
  • Die cut the black layer with GKD Master Layouts 7
  • Cut GKD Rose Mini Slimline Plate using ThermoWeb Toner Sheet.
  • Removed the floral and leave pieces and ran the base of the card through the laminator using Glimmering Gold foil.
  • Ran the floral and leaves through the laminator using Passionate Pink foil for the flower and Green Grass for the leaves.
  • Added adhesive to the back of the gold foil slimline and pieced the floral and leaves onto the base of the card.
  • Used the tag from Master Layout 7 Top Layer ink blended GKD Floral Stencil in Lovely Lavender, Jelly Bean Green
  • Added the Adhesive Transfer with the Hello Friend onto the card and ran it though my die cutting machine, then cut a piece of the Gold Deco Foil, placed it onto the area where I transferred the words and ran it through the laminator. Added to the card with foam squares.
  • Assembled the card. 


My last card is an A2 card using Deco Foil Adhesive Transfer Designs - Birthday Bliss.
  • A2 Top Fold Card Base: 4 1/4" x 5 1/2" (4 1/4" x 11", scored at 5 1/2") 
  • Die cut GKD Basket Weave Cover plate with ThermOWeb Toner Sheet, and then foiled with Fancy Foil Wild Lilac.
  • Die cut the Lovely Lavender card stock with Master Layouts 2 and added the foiled Basket Weave onto the layer and adhered it to the base of the card.
  • Added the Happy Birthday Adhesive Transfer to a white piece of card stock, ran it though my die cutting machine, then cut several different foilss onto the area where I transferred the sentiment and ran it through the laminator. 
  • Die cut the sentiment with the circle layering dies and added it to the card with foam squares.
  • Assembled the card. 
I hope you have been inspired, I truly enjoyed making these cards.  The foil is so easy to work with and makes beautiful cards.

Here is a list of supplies I used on my cards, Affiliate Links used at no additional cost. Thank you for your support.


SWEET N' SASSY STAMPS - Thank You!

Wednesday, March 30, 2022

Hello everyone!

I am here with Sweet n' Sassy Stamps featuring "Serene Silhouettes" and the "Thank You" stamp sets.  I love silhouette stamps and love how this card turned out.

Here is my card for your inspiration:


Here is how I created the card:

  • A2 Top Fold Card Base: 4 1/4" x 5 1/2" (4 1/4" x 11", scored at 5 1/2")
  • Black Panel: 4" x 5 1/4"Floral Panel: 3 7/8 x 5
  • Masked off three sections
  • Ink blended each section with blue ink
  • Stamped the silhouette images from the Serene Silhouettes with black ink.  
  • Stamped the "thank you" from the Thank You stamp set with versmark, used white embossing  powder and heat set.
  • Finished off the card by adding some embellishments from my stash.
Thank you so much for stopping by, please come back again soon.

Here is a list of supplies I used on my card, Affiliate Links used at no additional cost. Thank you for your support.

Kat Scrappiness - Birthday Wishes

Wednesday, March 30, 2022

Hello everyone!

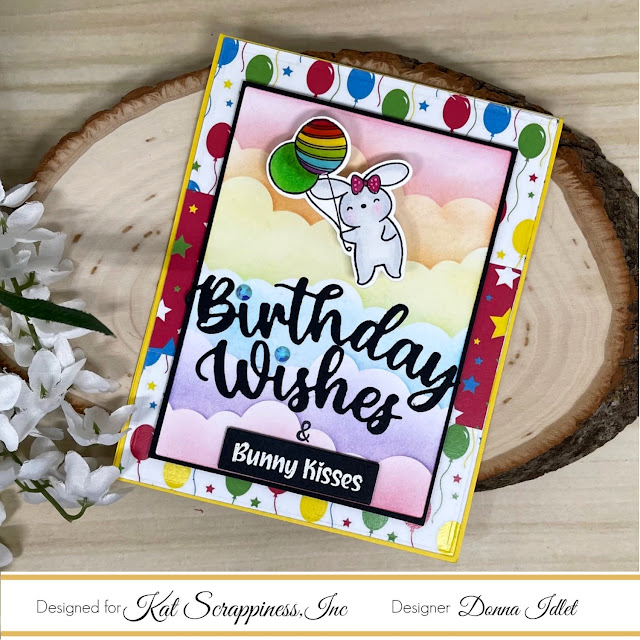
I am here with Kat Scrappiness sharing a bright and cheerful birthday card.  I love all the bold colors from the Birthday Essentials 6x8 paper pad from Kat Scrappiness.  This card I think will brighten anyone's day if they received it.  

Here is my card for your inspiration:


Here is how I created my card:
  • Created an A2 card measuring 4 2/4 x 5 1/2.
  • Die cut the top layer using Birthday Essentials paper with KS Embossed Edge Rectangle die.  
  • Cut the start paper from the Birthday Essentials paper pad at 3 x 4 1/4.
  • Cut the top layer with the Embossed Edge Rectangle, created some clouds in rainbow colors.
  • Stamped and die cut the bunny from the KS Hoppity Bunnies Stamp Set, added a MINI Action Wobble Spring to the back for an interactive card.
  • Die cut the Birthday from the KS Happy Birthday with shadow die.
  • Die cut the Birthday from the KS Christmas Wishes Word dies w/shadow
  • The sentiment is from the KS Hippity Hoppity Sentiments stamp Set, stamped and heat embossed it with white embossing powder.  Die cut the sentiment using KS Box Sentiment Dies.
  • Die cut the basket using the Hop Into Easter paper, the grass, the bunnies and bow using the Crafters Essentials - Easter Edition Dies.
  • Stamped, die cut and colored the cute bunny image from the KS Hoppity Bunnies Stamp.
  • Stamped and heat embossed with white embossing powder from the sentiment from the Hippity Hoppity sentiment stamp set.
  • Assembled the card.
Here is a short clip on how the bunny moves with the Wobble Spring.


Thank you so much for stopping by, I hope you have been inspired!

Here is a list of supplies I used on my card, Affiliate Links used at no additional cost. Thank you for your support.

RETRO RUBBER CHALLENGE BLOG #179 - Color Challenge

Tuesday, March 29, 2022

Hello everyone!

I am here with Retro Rubber Challenge blog and we have a new challenge which is a color challenge.  Be sure to stop over on the Retro Rubber Challenge blog to get more inspiration, the design team has some wonderful creations!

The rules to play along with Retro Rubber Challenge is very simple, make sure the stamp you use on your project is at least one year or older. For more details on the rules, you can find them over on Retro Rubber Challenge blog.


I am using a few stamp sets from Mama Elephant called Hello Friend Wishes Stamp.  The stamp set was released in June 2016. Love the bold sentiment that is perfect for a quick card to give to a friend.


Here is my card for your inspiration and how I put it together:

  • Created an A2 card measures 4 1/4 x 5 1/2
  • Die cut the top layer from Mama Elephants Mod Heart die set, I ink blended three of the five colors that should have been used for the challenge....they are bright orange, bright yellow and bright green.
  • Stamped the sentiment in black ink.
  • Assembled and added the heart and some sequence to finish off the card.
Thank you so much for stopping by, please come back again soon!

GINA K. DESIGNS MARCH 2022 RELEASE

Monday, March 28, 2022

Hello everyone!

I am here sharing some cards from the Gina K. Designs NEWLY release products from the March 2022 release.  I am using the NEWLY released "Lovely Ladies Stamp Set" and dies illustrated by Beth Silaika and Happy Hens Stamp Set and dies illustrated by Debrah Warner.  

You can see more inspiration from the full release on the Gina K. Designs & StampTV Friends Facebook page. To see the full release, you can go HERE under the What's New section.

Here are my cards for your inspiration:


My first card I used the "Lovely Ladies Stamp Set" and dies illustrated by Beth Silaika. I love this stamp set it has so many different sentiments that can be used for so many of your relatives, a great set to have in your stash.

Here is how I created the card:

Card is an A2 measuring 4 1/4 x 5 1/2.
Used the Bold Bouquet stencil, added Glitz Glitter Gel, Iridescent to the floral for some shine.
Die cut the panels using Master Layouts 1.
Added the sentiment from Lovely Ladies Stamp Set, heat embossed with fine white embossing powder and die cut the sentiment with the sentiment strip from Master Layouts 4.

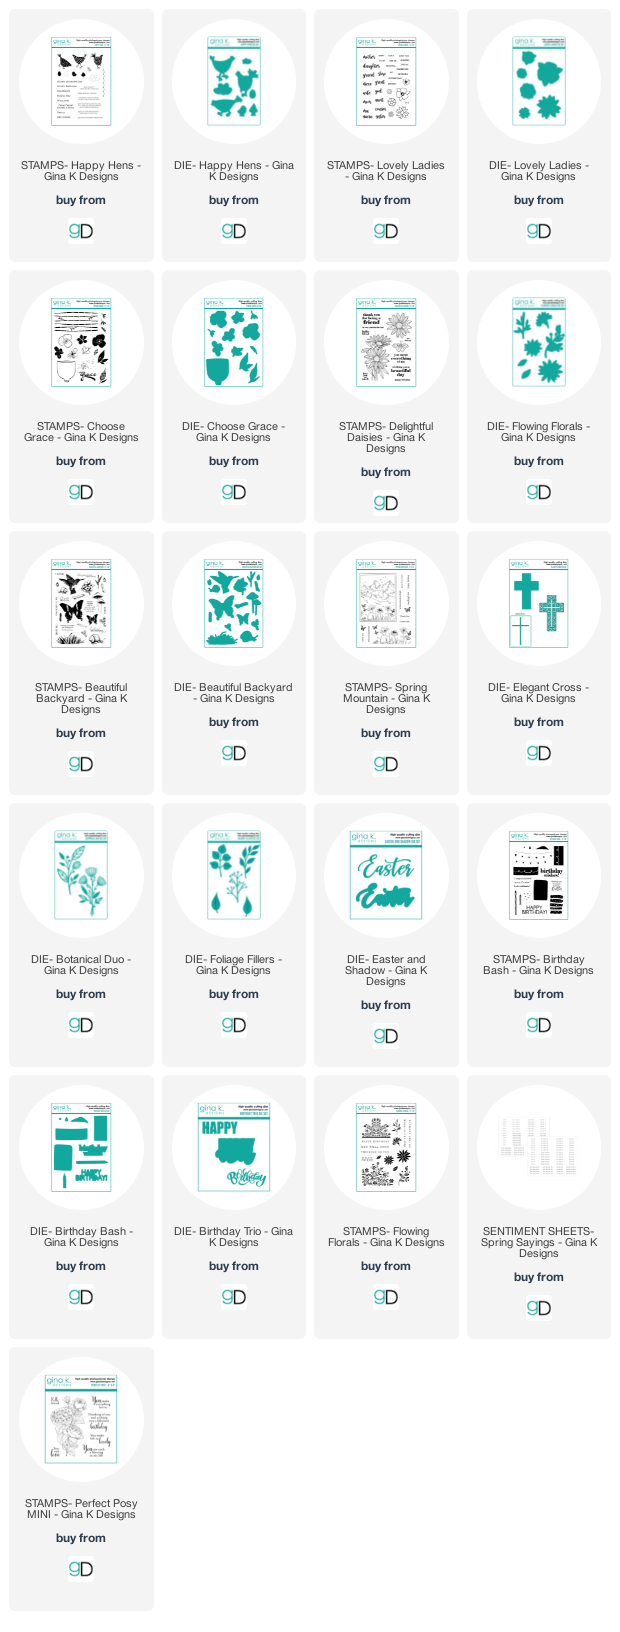
Supplies used for this cards, Affiliate Links used at no cost to you. Thank you for your support!
My second card for your inspiration:


I created this card using Happy Hens Stamp Set and dies illustrated by Debrah Warner.  This is a great addition to the GKD products. This set also has many different sentiments that can be used for all occasions.  

Card is an A2 measuring 4 1/4 x 5 1/2.
Created clouds in the background.
Die cut the panel using Master Layouts 2.
Created a woodgrain panel using GKD Ink, and die cut the fence from GKD Picket Fence.
Die cut the grass using GKD Master Layouts 6.
Stamped and die cut the images with GKD inks.
Die cut the images and added them to the card.
Stamped the sentiment from the Happy Hens Stamp Set.
Assembled the card.

Supplies used for this cards, Affiliate Links used at no cost to you. Thank you for your support!


GINA K. DESIGNS MARCH 2022 RELEASE 

(affiliate links used at no cost to you).

Newton's Nook Designs March 2022 Release - Reveal Day 3

Wednesday, March 16, 2022

Hello everyone!

Welcome back to Day 3 of the March 2022 Newton's Nook product reveal. The design team is featuring the Tulips and coordinating dies and Newton’s Blooms and coordinating dies which you can find here.  I am in love with all the floral stamp sets that has been released this week.  I think Spring is here!  Yesterday it was sunny and 70 degrees and today the temperature will be the same!

 
Here are my cards for your inspiration:


Here is how I created my first card using the Welcome New Dog stamp set and coordinating dies:

  • Mini Slimline Card Base: 3 1/2" x 6" (7" x 6", scored at 3 1/2" on the 7" side).
  • Black Panel: 3 1/4" x 5 3/4"
  • Top Panel:  3" x 5 1/4"
  • Ink blended the top panel with blue ink and splattered with water and black paint.
  • Stamped the tulip and the butterfly images (die cut the tulip twice) die cut with the coordinating dies and colored the images with alcohol markers.
  • Added the tulips to the card base using foam squares to pop them up, then adhered the butterflies randomly on the card.
  • Finished the card off by adding the sentiment from the Tulip Stamp Set.


Here is my second card using the Newton’s Blooms and coordinating dies and the Springtime Paper Pad .


  • A2 Top Fold Card Base: 4 1/4" x 5 1/2" (4 1/4" x 11", scored at 5 1/2")
  • Black Panel:   4" x 5 1/4"
  • Floral Panel:  3 7/8 x 5
  • Die cut the black oval frame from the Newton's Oval Frames Die Set.
  • Stamped the images from the Newton’s Blooms Stamp Set, Colored with alcohol markers, and die cut with the coordinating dies.
  • Stamped the sentiment with versamark and heat embossed with white embossing powder.
  • Assembled the card.


Would you like to win the “Tulips” or the “Newton’s Blooms” Stamp Set? We will choose ONE lucky winner for each stamp set!  

Here's how to win: Comment on the NND blog and Design Team blogs (see list below)! The winner will be chosen at random from the collective reveal posts. Make sure to check out each of their blogs and comment for your chance to win. You will not know which blog has been chosen so the more you comment on the better your chances are of winning! You have until Wednesday March 16th at 9pm ET to comment -- winners will be announced on the blog post on Thursday March 17th.

Check out all the awesome Design Team Blogs below to enter:

Donna Idlet YOU ARE HERE

SWEET N' SASSY STAMPS - Begin Again

Wednesday, March 16, 2022

Hello everyone!

I am here again with Sweet n' Sassy Stamps featuring the beautiful stamp set called "Begin Again".  This is a beautiful set, I love the different sizes of the butterflies and the sentiments in this set are very nice and can be used for many occasions. 

Here is my card for your inspiration:


  • A2 Top Fold Card Base: 4 1/4" x 5 1/2" (4 1/4" x 11", scored at 5 1/2")
  • Black Panel:   4" x 5 1/4"Floral Panel:  3 7/8 x 5
  • Stamped the images with VersaFine Clair - Ink Pad Nocturne Ink and heat embossed with clear embossing powder.
  • Inked blended using the embossed resist technique.
  • Stamped the sentiment from the "Begin Again" stamp set.
  • Finished off the card by adding some pearl embellishments.
Thank you so much for stopping by, please come back again soon. 

Here is a list of supplies I used on my card, Affiliate Links used at no additional cost. Thank you for your support.

Newton's Nook Designs March 2022 Release - Reveal Day 2

Tuesday, March 15, 2022

Hello everyone!

Welcome back to Day 2 of the March 2022 Newton's Nook product reveal. The design team is featuring the adorable Welcome New Dog , Welcome New Cat stamp sets with coordinating Dies and a Petite Paw Prints Stencil. This is a great set for all the cat and dog lovers.

Here are my cards for your inspiration:


Here is how I created my first card using the Welcome New Dog stamp set and coordinating dies:  
  • Cut & Score Top Fold Card Base: 4 1/4″ x 5 1/2.
  • Stenciled the background of the card base using the newly released Petite Paw Prints Stencil.  
  • Die cut the top layer using the A7 Frames & Banners Die Set the grass was cut from the Lands Border Die Set with pattern paper from the newly release Springtime paper pad.
  • Stamped and die cut the images from the Welcome New Dog stamp set.  
  • Colored the images with alcohol markers.
  • Stamped the sentiment from the  Welcome New Dog stamp set and die cut the sentiment using the Frame & Flags Die.
  • Assembled the card.


Here is my second card using the Welcome New Cat and coordinating Dies


  • Cut & Score Top Fold Card Base: 4 1/4″ x 5 1/2.
  • My stripe paper is cut from the Spring paper pad (4 x 5 1/4).
  • Die cut a heart from the Heart Frames Die Set to create a shaker card.
  • Stenciled the background behind the heart using the newly released Petite Paw Prints Stencil.
  • Added some acetate behind the heart opening, added some foam tape behind it, added some paw embellishments and adhered this to the base of the card.  
  • Stamped and die cut the images from the Welcome New Dog stamp set.  Colored the images with alcohol markers.
  • Stamped the sentiment from the  Welcome New Cat stamp set and die cut the images with the coordinating dies.
  • Assembled the card.

Would you like to win the “Welcome New Cat" or the "Welcome New Dog" Stamp Set?
We will choose ONE lucky winner for each stamp set!

Here's how to win: Comment on the NND blog and Design Team blogs (see list below)! The winner will be chosen at random from the collective reveal posts. Make sure to check out each of their blogs and comment for your chance to win. You will not know which blog has been chosen so the more you comment on the better your chances are of winning! You have until Wednesday March 16th at 9pm ET to comment -- winners will be announced on the blog post on Thursday March 17th.

Check out all the awesome Design Team Blogs below to enter:

Donna Idlet - YOU ARE HERE

Thank you for stopping by, please come back again tomorrow for the last day of inspiration before the release!


RETRO RUBBER CHALLENGE BLOG #178 - ANYTHING GOES

Tuesday, March 15, 2022

Hello everyone!

I am here with Retro Rubber Challenge blog and we have a new challenge, which is a fun sketch. Be sure to stop over on the Retro Rubber Challenge blog to get more inspiration, the design team has some wonderful creations!

The rules to play along with Retro Rubber Challenge is very simple, make sure the stamp you use on your project is at least one year or older. For more details on the rules, you can find them over on Retro Rubber Challenge blog.


I am using a few stamp sets from Taylored Expressions called Big Grumpy Stamp and Die Combo, Big Grumpy Birthday and Birthday Background. The stamp sets were released in September 2019. Love these stamp sets, you could mass produce this card and have it on hand when you need a birthday card.


Here is my card for your inspiration and how I put it together:
  • Created an A2 card measures 4 1/4 x 5 1/2
  • Die cut two layers and stamped the background stamp called Birthday Background.
  • Stamped the image from the Big Grumpy Birthday stamp set on watercolor paper and used water colors to color.
  • Stamped the sentiment with black ink from the Big Grumpy Birthday Stamp Set.
  • Assembled card.
Thank you so much for stopping by, please come back again soon!

Newton's Nook Designs March 2022 Release - Reveal Day 1

Monday, March 14, 2022

Hello everyone!

I am here with Newton's Nook Designs and today is Reveal Day 1 of the NEWLY released products that will be available on Friday, March 18th. The design team is featuring Best Mom Oval Stamp Set, Oval Frames Die Set and Springtime Paper Pad.  This is a great stamp set, it can be used for many occasions, not just Mother's Day.
Here is my card I created today for your inspiration:


Here is how I created it:
  • Cut & Score Top Fold Card Base: 4 1/4″ x 5 1/2.  
  • Die cut the top layer from the newly released paper pad called Springtime using the Frames & Flags Die Set.
  • Stamped the image from the Best Mom Oval Stamp set, colored with alcohol markers and die cut it with the newly released Oval Frames Die Set.
  • Stamped the sentiment from the Oval Frames Die Set.
  • Assembled the card and finished it off by adding some pearl embellishments from my stash.


Would you like to win the “Best Mom Oval” Stamp Set? This stamp set will be given away to ONE lucky winner!

Here's how to win: Comment on the NND blog and Design Team blogs (see list below)! The winner will be chosen at random from the collective reveal posts. Make sure to check out each of their blogs and comment for your chance to win. You will not know which blog has been chosen so the more you comment on the better your chances are of winning! You have until Wednesday March 16th at 9pm ET to comment -- winners will be announced on the blog post on Thursday March 17th.
  

Check out all the awesome Design Team Blogs below to enter:

Newton's Nook Designs

Donna Idlet  YOU ARE HERE

Ellen Haxelmans

Tina Herbeck

Larissa Heskett

Samantha Mann

Zsofia Molnar

Farhana Sarker

Tatiana Trafimovich

Amanda Wilcox


Thank you for stopping by, please come back tomorrow for more inspiration!


Kat Scrappiness - Happy Spring

Sunday, March 13, 2022

Hello everyone!

I am here with Kat Scrappiness sharing a card I created using the NEWLY released KS Hoppity Bunnies and Hippity Hoppity sentiment stamp sets and the 6x8 paper called Hop Into Easter.  Springtime is almost here, are you ready?  Today should be nice, but yesterday we had a little snow.  The weather has been crazy!

Here is my card for your inspiration:

  • Created an A2 card measuring 4 2/4 x 5 1/2.
  • Die cut the top layer with KS Embossed Edge Rectangle die and created clouds in the background.
  • Die cut the basket using the Hop Into Easter paper, the grass, the bunnies and bow using the Crafters Essentials - Easter Edition Dies.
  • Stamped, die cut and colored the cute bunny image from the KS Hoppity Bunnies Stamp.
  • Stamped and heat embossed with white embossing powder from the sentiment from the Hippity Hoppity sentiment stamp set. 
  • Assembled the card and finished it off by adding Aqua AB and Yellow Jewels.

Thank you so much for stopping by, I hope you have been inspired!

Here is a list of supplies I used on my card, Affiliate Links used at no additional cost. Thank you for your support.

Kat Scrappiness - March 2022 New Release

Friday, March 11, 2022

Hello everyone!

I am here with Kat Scrappiness, Inc., and we have a new release for this month! I am showcasing two cards that I created using the NEW Stamp sets, Papers and Jewels! What's a new release without a giveaway. Kat Scrappiness is giving away the FULL release!  Leave a comment on the Kat Scrappiness blog and a winner will be chosen randomly and announced on KS Blog March 22.

Here are my cards for your inspiration:


My first card is a mini slimline card  measuring 3 1/2" x 6".  I am using the newly released KS Hoppity Bunnies and KS Hippity Hoppity sentiment stamp sets.  I die cut the word "Easter" from the KS Condensed Alpha Upper using the NEWLY released 6x8 paper called Hop Into Easter and added to the base of the card using KS Mini Slimline Scalloped Edge Dies.  I finished the card off by adding the NEWLY released KS Aqua AB Jewels.


My second card is an A2 card measuring 4 1/4 x 5 1/2.  I created a shaker card using KS Spring Has Sprung and Pastel Love Sprinkles.  I used the  KS Hoppity Bunnies and KS Hippity Hoppity sentiment stamp sets on the card.  I finished off the card by adding some enamel dots My Valentine and Ice Ice Baby Enamel Dots on the flowers.

ALSO… For more inspiration be sure to check out the Instagram Hop (#kshopintoeaster2022) starting at 12noon EST today March 11, 2022 there is a special prize to be given away over there as well.  Instagram hop will start @katscrappiness IG page. 


Thank you so much for stopping by, I hope you have been inspired. I hope you will stop by the Kat Scrappiness Blog and see all the inspiration from the design team.

Here is a list of supplies I used on my cards. Affiliate Links used at no additional cost. Thank you for your support.

Sweet n' Sassy Stamps - Sweater Weather

Wednesday, March 9, 2022

Hello everyone!

I am so excited to be guest designing for Sweet n' Sassy Stamps this month and April.  I am featuring the Stamp called Sweater Weather and the background Stencil called Knit. I know Spring is right around the corner, but the weather has been a little crazy here in Northern Virginia.  The weekend we had almost 80 degree weather and today the high is going to be 45 degrees and raining so we may need to wear a hat and scarf.

Here is my card for your inspiration:


 Here is how I created my card.

A2 card, measuring 4 1/4 x 5 1/2

Die cut the top panel and randomly stamped the images from the Sweater Weather Stamp set and colored them with copics.

Masked the images and inked blended the background with SNSS Knit stencil.

Added the sentiment.

Thank you so much for stopping by, please come back again soon.

Here is a list of supplies I used on my card, Affiliate Links used at no additional cost. Thank you for your support.

Cupcake Inspirations Challenge Blog - Newton's Nook Design

Monday, March 7, 2022

Hello everyone!

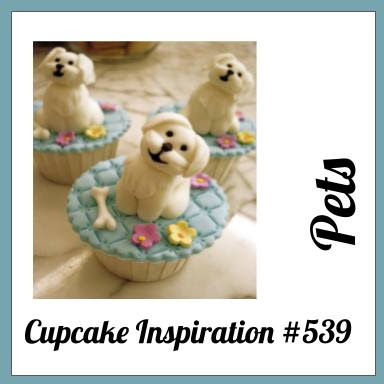
Welcome to Cupcake Inspirations Challenge, this is my first time joining their challenge.  Their challenge is where crafting is inspired by cupcakes!  Every challenge there is a cupcake image to inspire you, with a theme.  

This challenge is a "Pets" theme.  For this challenge, Newton's Nook Designs is a sponsor...fitting right!? The prize is a $25 gift card to the Newton's Nook Store.  For rules and details on the challenge, please head over to the Cupcake Inspirations Challenge Blog.


Here is my card, I am using using Newton's Nook Puppy Pals Stamp Set.


My card is an A2 card, The top layer is die cut using NND Framework Die, I used the NND Woof Stencil for the background. I stamped and die cut the cute dogs from the Puppy Pals stamp set and colored with copics. The bottom stripe layer is cute from NND Coffee House Stories 6x6 paper pad. I stamped the sentiment from the Puppy Pals Stamp Set and die cut it out with NND Frames and Flag die.

Thank you so much for stopping by, please come back again soon!

Newton's Nook Designs - Happy St. Patrick's Day!

Wednesday, March 2, 2022

Hello everyone!

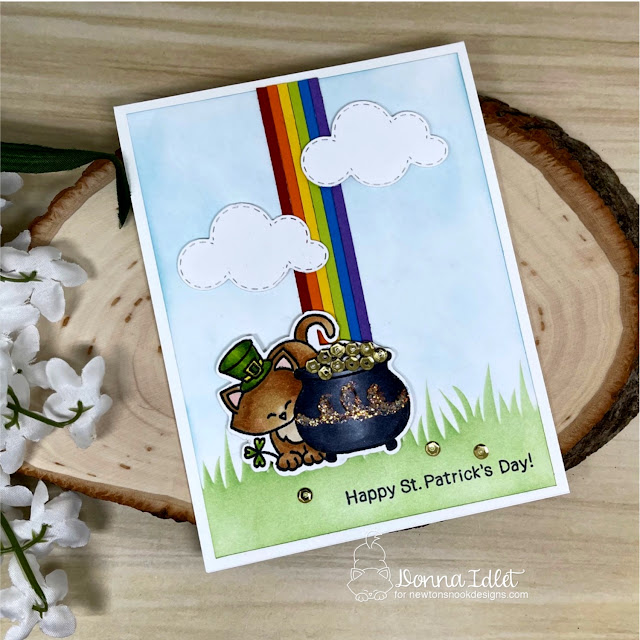
I am here with Newton's Nook to share this cute card I created using the stamp set "Newton's Pot of Gold". This is a 3 x 4 stamp set that can be used to send someone a Happy St. Patrick's Day card, but can also be used to send some one a good luck card.
 
Newton's Pot of Gold stamp set, Newton's Nook Designs, Happy St. Patrick's Day card, copic coloring, rainbow, Hills and Grass, Sky Scene Builder Die Set

Here is how I created my card:
  • Card is an A2 card which measures 4 1/4 x 5 1/2.
  • Stamped the image of the kitty with the pot of gold and colored it using Copic markers.
  • Added glued some small sequins for the pot of gold into the pot. Added some gold stickles to the pot. Sat this aside to dry.
  • Cut the top panel 4 x 5 1/4, used the Hills and Grass stencil to create the grass and ink blended the background with light blue ink for the sky.
  • Stamped the sentiment from the "Newton's Pot of Gold" Stamp Set.
  • Cut 1/8 inch strips in rainbow colors and glued them together.
  • Die cut some clouds from the Sky Scene Builder Die Set, used foam tape to pop the clouds up onto the card.
  • Assembled the card, added some gold sequins to finish off the card.
Newton's Pot of Gold stamp set, Newton's Nook Designs, Happy St. Patrick's Day card, copic coloring, rainbow, Hills and Grass, Sky Scene Builder Die Set

I hope you were inspired to create St. Patrick's Day cards for your family and friends.

Thank you for stopping by, please come back again soon!


Gina K. Designs - February 2022 Release Continued

Tuesday, March 1, 2022

 Hello everyone!

I am here sharing some more cards from the Gina K. Designs NEWLY release products from the February 2022 release. I am featuring the NEWLY released "Forest Friends Addion" stamp set with dies illustrated by Melanie Muenchinger along with the "Forest Friends" stamp set released in December 2021. I am also using the NEWLY released "Baby Love" stamp set with dies illustrated by Debrah Warner.  

You can see more inspiration from the full release on the Gina K. Designs & StampTV Friends Facebook page. To see the full release, you can go HERE under the What's New section.

Here are my cards for your inspiration:


My first card I used the "Forest Friends" and "Forest Friends Addion" with dies stamp sets illustrated by Melanie Muenchinger.  I love these stamp sets the images look so real and are so stinking cute!

Here is how I created the card:  
  • Card is an A2 measuring 4 1/4 x 5 1/2.
  • Stamped and die cut the images.
  • Used colored pencils to color in the details.
  • Die cut the panels using Master Layouts 1.
  • Ink blended the back panel using GKD Frizzy Stencil. 
  • Added the sentiment from Forest Friends Additions. 
Supplies used for these cards, Affiliate Links used at no cost to you.  Thank you for your

My second card I created using  "Baby Love" stamp set illustrated by Debrah Warner.


Card is an A2 measuring 4 1/4 x 5 1/2.
Stamped the background with the images from the Baby Love stamp set.
Die cut the panel using Master Layouts 2.
Stamped the image and colored with Copics.
Die cut a square from the ML 3.
Stamped the sentiment from the Baby Love stamp set onto the square panel and added to the card. 
Added the image to the center of the square with a foam square. 

Supplies used for these cards, Affiliate Links used at no cost to you.  Thank you for your support!
Thank you so much for stopping by, I hope I have inspired you!


GINA K. DESIGNS 
NEW RELEASE FEBRUARY 2022

Made With Love By The Dutch Lady Designs
Follow Me on Pinterest