Gina K and the team have received such amazing
feedback on the new Foil-Mates, Fancy Foils and dies that we have decided to
put together a special hop for you today! This blog hop is a blend of a video
blog hop featuring tutorials from Gina K and a few members of the team and a
traditional blog hop featuring beautiful cards from other members of the
team.
Over the past few weeks, the Foil-Mates products have been flying
off the shelves at Gina K Designs. Please be assured that if they are out-of-stock,
they will quickly be back on the shelves again soon. In fact, Gina just stocked
the shelves with a fresh batch of Foil-Mates, Fancy Foils and dies and more
will be on the way.
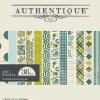
If you are new to Foil-Mates, they are used to step-up the shimmer
and shine in your card projects! Creating cards is never more easy and
beautiful when you work with this new line of foil products. From beautiful pre-printed
Foil-Mates, to stunning colors of Fancy Foils, when you combine them together
the outcome is stunning! Discover how many various
combinations of different cards and invitations you are able to create with
Gina’s Foil-Mates products. With many of Gina’s most popular signature colors
now available in foil, coordinating with Gina K Designs card stock and ink has
never been easier!
We would like to thank Therm O Web for being such a great partner
in the Foil-Mates line of products.
Enjoy the gorgeous inspiration samples from the team and then
comment on each blog. We will be selecting one lucky commenter at the end of
the hop and that person will win a $50 Gina K Designs gift certificate! To see
who won, check the Big News Forum at StampTV a few
days after the hop. Ready for some inspiration? Here are a few of the projects
I have created for today’s hop:
My first card features the Birthday Essentials Foil-Mates Sentiments set. I cut the image out using the Foil-Mates Rectangle Large set and foiled it with Passionate Pink - Fancy Foil. I then used the Stars and Stripes foil Mates and used Passionate Pink - Fancy Foil for the polka dots and the Turquoise Sea Foil - Fancy Foils for the stripes. I am in love with all these foils, it sure does make a classy card for anyone you want to send one to.
GKD Supplies Used:
Birthday Essentials Foil-Mates
Polka Party Foil-Mates
Stars & Stripes Foil-Mates
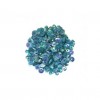
Turquoise Sea Foil - Fancy Foils
Passionate Pink - Fancy Foils
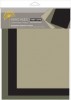
GKD Pure Luxury Cardstock - White, Black and
Passionate Pink
Small & Large Rectangle Foil-Mates Die Sets
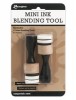
Thermoweb 3D1/4" Foam Squares
Thermoweb Sticky Dot Runner
Here is a closer look of the card.
My next card, I am using the Birthday Essentials Foil-Mates Sentiments set again. The background, I used the Stars & Stripes Foil-Mates, I foiled the stars with Jelly Bean Foil - Fancy Foils and the stripes with Turquoise Sea Foil - Fancy Foils. I used the negative that I foiled from the card above. It's so nice that you can use every piece of the foil if you have To the Deco Foil Toner Sheets. Gina K has a nice video you can watch if you are not sure how to use the Deco Foil Toner Sheets.
GKD Supplies Used:
Birthday Essentials Foil-Mates
Stars & Stripes Foil-Mates
Turquoise Sea Foil - Fancy Foils
Jelly Bean - Fancy Foils
Passionate Pink - Fancy Foils
Wild Lilac - Fancy Foils
GKD Pure Luxury Cardstock - White and Black
Small & Large Oval Foil-Mates Die Sets
Thermoweb 3D1/4" Foam Squares
Thermoweb Sticky Dot Runner
Closer look of the card, here you can see the colors very well.
My next card is a very clean and simple card, again I used the negative piece that I foiled with the Deco Foil Toner Sheet, I also die cut the butterfly with the Toner Sheet and foiled it with
Turquoise Sea Foil - Fancy Foils. The sentiment if from the Gina K Massive Messages.
GKD Supplies Used:
Polka Dot - Foil-Mates
Turquoise Sea Foil - Fancy Foils
Jelly Bean - Fancy Foils
GKD Pure Luxury Cardstock - White and Black
Thermoweb Sticky Dot Runner
Closer look of the card
My last card I have lots of elements on this card. I embossed the background and layered it with the GKD layering black cardstock. I then used the negative from my second card which was the
Stars & Stripes Foil-Mates using the Toner Sheet. I die cut the stars with the small and large foil mates die sets. I die cut the True Friend - foil-Mates sentiment and then foiled it with the Jelly Bean Fancy Foil. I added all the elements to my card. I finished it off by die cutting the stars from the Large Rectangle Foil-Mates Die Set and adhered them to my card.
GKD Supplies Used:
True Friend Foil-Mates
Stars & Stripes Foil-Mates
Jelly Bean - Fancy Foils
GKD Pure Luxury Cardstock - White, Black
and Jelly Bean Green
Small & Large Circle Foil-Mates Die Sets
Large Rectangle Foil-Mates Die Set
Thermoweb 3D1/4" Foam Squares
Thermoweb Sticky Dot Runner
Closer look at the card.
Ready for more awesome creations?! Just click on the links below
for more from Gina and the Cast & Crew:
Don’t forget to pop over to the Gina K Designs Store and check out
all of the new products available this month in the “What’s New” section at http://www.ginakdesigns.com.
Thank you for stopping by!