Showing posts with label hero arts year round sentiments. Show all posts

Retro Rubber Challenge #91 - Sketch

Tuesday, July 17, 2018

Hello everyone!

I am here with Retro Rubber Challenge blog and we have a new challenge, which is a sketch! Thank you Claire for such a cute sketch! I love it.

If you have not joined our challenges before, the rules are very simple, just use a stamp older than a year and you must include the age (or approximate age) of the stamp in your blog post. Here is the sketch for you to use. I cannot wait to see you take on it.
No automatic alt text available.

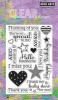
Here is my take on the challenge. My card is an A2 card, it's clean and simple. The sentiment I used on my card is an oldie but goody stamp set that I love from Hero Arts called Year Round Sentiments. This stamp set was released sometime in December 2014.  This set is so versatile, it has many sentiments for anytime of the year.


Are you ready to play along? Be sure to stop over on the Retro Rubber Challenge blog to get some more inspiration, the design team has some wonderful creations! Thank you for stopping by, you have until July 27th to join the fun!


A Blog Named Hero with WOW!

Wednesday, August 2, 2017

Hello everyone!

I am here with A Blog Named Hero and we are collaborating with WOW this month!  WOW has many products, today I am featuring their embossing powders, embossing glitters  and foil.  I had so much fun using their products, I could not just make one card.  I have three here to share with you today.  Please stop by A Blog Named Hero's blog tomorrow for more inspiration and a new challenge!

Here are my cards:


All my cards are A2 cards.  This card,  I am using Hero Arts "Drippy Lines Bold Print" background stamp.  I inked the stamp with WOW embossing pad and then embossed with WOW "Unicorn Magic".  I also stamped the butterfly twice from the Hero Arts "Die and Stamp - Butterfly" and embossed it with the WOW "Unicorn Magic" then I colored the butterfly with Prismacolor Colored Pencils and added some clear Wink of Stella. I then stamped the Happy Birthday from the Hero Arts "Year Round Sentiments" with the WOW "Metallic Gold Rich" Super Fine embossing powder and adhered it to my card.  I finished my card off by adding some sequins.


My next card is one of my favorite stamps by Hero Art called "Leafy Vines".  I again inked the stamp using the WOW embossing pad and added the WOW glitter embossing powder called "Princess Pink".  I added the sentiment from the Hero Arts "Many Everyday Messages" stamp set and embossed it with WOW "Red Pearl".  A clean and simple card, but elegant!  This card would be perfect for a wedding.


My last card, I am using the WOW "Bright Silver" Foil, this picture doesn't show all the details of the beautiful foil.  I don't own a laser printer, so I stamped the Hero Arts Leafy Vine stamp with black Archival Ink on some white cardstock and took the image to Staples and had them make a few copies on their laser copier (they didn't charge me anything because I brought my own paper).  I then added the foil to the laser copy and ran it through my Laminator.  I added my sentiment from Hero Arts "Many Everyday Messages" stamp set.  I embossed it with the WOW "Opaque Seafoam White".

I hope I have inspired you in some way to get those embossing materials out and have fun!  Thank you so much for stopping by, please come back again soon.

Please help support A Blog Named Hero by shopping through our links. These are affiliate links, at no additional cost to you. We appreciate your support.

A Blog Named Hero - Happy Birthday!

Wednesday, April 5, 2017

Hello everyone!

I am here with A Blog Named Hero to share another project with you featuring Hero Arts! How did you enjoy the 5th Anniversary Blog Hop?  To stay in the line of celebration, there is a new challenge for this month and it is "anything goes".  We want to see your love of Hero Arts, so please join in on the fun!
Here is my card for your inspiration:


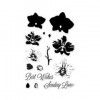
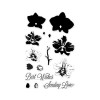
I am using the Hero Arts Layering Large Orchid stamp set and the sentiment is from one of my favorite sentiment sets by Hero Arts called Year Round Sentiments.
  1.  My car is an A2 card,
  2. I used the Hero Arts rectangle infinity dies for my layers,
  3. I used the 80lb neenah paper to stamp my flowers,
  4. I added my sentiment with Hero Arts black ink,
  5. And finished my card off with some sequins.
My card is a clean and simple card, if you have not used the layering stamp sets they are so easy.  Most of the combos come with suggested inks you can use. I hope I have inspired you to join in on the challenge, there will be one random entry can win a prize from, A Blog Named Hero.  Please remember to follow all of our challenge rules so that you’re eligible for our prize.

The challenge ends at 11:59PM EST on April 29th and the winner will be announced shortly after! Please add your card using the linky tool here. Good luck and we can not wait to see what you create.

Thanks for stopping by, please come back again soon for some more inspiration!


Retro Rubber Challenge #42 - Brads or Eyelets

Tuesday, July 5, 2016

Hello everyone,

It's July and Retro Rubber Challenge blog has a new challenge for you. To join the challenge, simply use a stamp one year old or older, tell us how old it is and follow the theme, which is use brads or eyelets on your project. It's so much fun to join Retro Rubber's challenges. Don't forget to stop by the blog and see all the other design teams creations.

Here is my card.  I stamped my sentiment, which is from the Hero Arts stamp set "Year Round Sentiments".  This is one of my favorite go to stamp sets.  There are so wonderful sentiments in the set.  I used a flower die from Memory Box and die cut nine of them out.  I used my piercing tool to make a hole in the center and added some brads from my stash.  How many of you have lots of brads and eyelets in those memory box holders?  I do!  I was so happy to use them on my project.  After adding the brads, I lined them up where I wanted them and added glue dots and adhered them to my layer. 

closer look at the flowers and brads


You have until July 15th to join the challenge. Don't forget to stop over at the Retro Rubber Challenge blog and join the fun and check out the beautiful projects the design team members have created. Leave me a comment to tell me how you liked my card, I love to read them. Thanks for stopping by, come back again soon!!

Supplies Used:


Made With Love By The Dutch Lady Designs
Follow Me on Pinterest