Showing posts with label A Blog Named Hero. Show all posts

A Blog Named Hero with Simon Says Stamps

Wednesday, December 6, 2017

Happy Holiday everyone!

I am here with A Blog Named Hero and this month we are collaborating with Simon Says Stamps  to help celebrate their fabulous Die-cember release!  Our challenge this month is "Winter Holiday".  I am using the newly released die from Simon Says called "Everglade Collage".  The penguin is from Hero Arts called Baby Penguin Color Layering stamp set.


Here is how I put my card together:

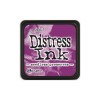
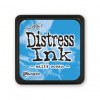
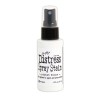
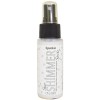
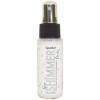
I die cut the Simon Says Everglade Collage wafer thin die which measures 4.4 x 3.25.  I cut another piece of cardstock the same size as the die and used Tim Holtz distress oxide ink Salty Ocean for the background.  I sprayed the background with some water and then added some Sheer Shimmer Spritz Spray Sparkle to give the background some shine.  I used foam tape and put the die cut image and distress background together and then adhered it to the card.

I stamped the penguin with the coordinating colors which are Hero Arts Soft Granite, Charcoal and Black.  I die cut it out with the coordinating die and adhered it to the card.  I stamped and die cut the hat and popped it up on the penguin and added the bow tie which I die cut out with plaid paper.  Isn't this penguin the cutest?  This is a must have in your stash!

To finish the card, I added the sentiment which I stamped with versamark on black cardstock and embossed and heat set with Hero Arts white embossing powder.  I die cut it out and used foam tape and added it to my card.


I hope you get a chance to play along with this month’s challenge! All you need to do is use at least one Hero Arts product on your project and follow this month’s theme, "Winter Holiday". Link up your card for a chance to win a great prize from Simon Says Stamps! Can’t wait to see what you create!!

Please help support A Blog Named Hero by shopping through our links. These are affiliate links, at no additional cost to you. We appreciate your support.

Simon Says Stamp
Ellen Hutson
Hero Arts


A Blog Named Hero - One Layer Challenge

Monday, September 18, 2017

Hello everyone!

It's Donna here and I am here with A Blog Named Hero and all month long we have been collaborating with CAS-ual Friday Stamps . Have you had a chance to play along with our one layer challenge yet? If not, please hop over to A Blog Named Hero and play along. You can post your project here. Be sure to stop over at "A Blog Named Hero" to see all the wonderful creations made by the design team.

My one layer card I am using the CAS-ual Friday stamp set called "Loving Thoughts", I love the bold words and flowers that are in the stamp set. I stamped the florals in different Hero Arts soft inks. I added the sentiment from the Hero Arts rubber stamp "Thoughtful. I finished off my card by adding some nuvo glitter drops and some twine from my stash.


Thank you for stopping by.  I hope you have enjoyed seeing my card. Thank you  CAS-ual Friday Stamps for collaborating with A Blog Named Hero! I really enjoyed working with your products!

Please help support A Blog Named Hero by shopping through our links. These are affiliate links, at no additional cost to you. We appreciate your support.

Simon Says Stamp
Ellen Hutson
Hero Arts


A Blog Named Hero with CAS-ual Friday Stamps

Wednesday, September 6, 2017


Hello everyone,


It's Donna here and I am with A Blog Named Hero and we have a new challenge for this month.  The challenge is "one layer".  I hope you will join in on the fun.  You can post your project here.  This month we are collaborating with CAS-ual Friday Stamps.  Be sure to stop over at "A Blog Named Hero" and see all the wonderful creations made by the design team.


Here is my take on the challenge:


Here is how I put my card together:

1.  I started with an A2 card, 4 1/4 x 5 1/5
2.  I used Hero Arts Floral Fiigree stencil and used Hero Arts Caramel to ink the background of the card, I was trying to get an ombre look, going from dark to light, starting from the bottom,
3.  I used the CAS-ual Friday stamp set Modern Petals and stamped a couple of the borders from the set at the bottom using Versafine Onyx Black Ink,
4.  I stamped the pineapples using the Hero Arts Color Layering Pineapple stamp set the inks I used were Hero Arts Butter Bar, Caramel,  Green Apple and Forever Green,
5.  I added a small panel on the right side of the card to give the pineapples some dimension.  I used the CAS-ual Friday stamp set Modern Petals and added a few borders from the stamp set,
6.  I added the sentiment,
7.  Popped the pineapples on the panel and then adhered the panel to the card using popped dots,
8.  I finished the card by adding some black enamel dots.

I hope I have inspired you in some way to get those embossing materials out and have fun! Thank you so much for stopping by, please come back again soon.

Please help support A Blog Named Hero by shopping through our links. These are affiliate links, at no additional cost to you. We appreciate your support.

Simon Says Stamp
Ellen Hutson
Hero Arts


A Blog Named Hero with WOW!

Monday, August 21, 2017

Hello everyone!

I am here with A Blog Named Hero, I hope you have enjoyed seeing everyone's projects using the WOW products this month.  I certainly have enjoyed using their products.  Have you joined the challenge over at  A Blog Named Hero's blog?  The challenge this month is embossing and I'm sure you will have a great time playing along with the design team! 


 Here are my cards:


1.  My card is an A2 card,
2.  I cut another black panel at 4 1/4 x 5 1/2 and added my stencil on top of it,


3.  I added some Deco Foil - Gel Transfer and let it dry overnight,


4.  After the Deco Foil - Transfer Gel dried, I added my WOW Silver Fab Foil and ran it through my laminator machine,
5.  I then added the foiled panel to my card,
6.  I die cut the "Happy" twice one with black cardstock and silver cardstock from the Happy Stamp and Die Stamp Set and adhered it to the piece of vellum,
7.  I then stamped the sentiment with WOW embossing pad and WOW Black Puff Powder,
8.  I finished my card off with some sequins.

I hope I have inspired you in some way to get those embossing materials out and have fun!  Thank you so much for stopping by, please come back again soon.


Please help support A Blog Named Hero by shopping through our links. These are affiliate links, at no additional cost to you. We appreciate your support.


Joy Clair - Everyday Collection Inspirational Blog Hop - Day 1

Wednesday, August 16, 2017

Hello everyone!

I am here with Joy Clair with a huge new release!   So don't miss out on hopping along with us for the next two days, you will want to see what the design team has created. Today I am featuring the new set "October Fun".  This set has five adorable Halloween images dressed up in their costumes and lots of sentiments you could use! 

As always, Joy Clair has an awesome giveaway! Two lucky winners will have a chance to win a $25 Joy Clair gift certificate to spend in the store. To be a winner you must comment on Joy Clair's blog and each Design Team's blog (list is below).

JC_GIFTCARDS


Here is my card:


Here is how I created my card:
  1. My card is an A2 card (vertical) measuring 4 1/4 x 5 1/2,
  2. I cut a piece of cardstock to 4 1/4 x 5 1/2, I die cut a circle on a piece of post it note and used it as a mask to create the moon.  I then took the circle I die cut out and covered the moon and distress the rest of the card with distress inks ( Chip Sapphire, Black Soot, Mustard Seed, Seedless Preserve, Antique Linen and Victorian Velvet).  I sprayed some Shimmer splattered some distress white picket paint onto the finished distress inked piece and adhered this to my card,
  3. I stamped and cut the images out with my Brother Scan and Cut, and then colored them with copics,
  4. I  stamped my sentiment and bats,
  5. Then I added the fence and used dimensional's on the characters to pop them up in front of the fence. 
I hope you enjoy looking at my card as much as I loved making it.  Here is a closer look at the card, can you see the Shimmer Spray I added?


Let's start the fun!  Just leave your comments and tell us which is your favorite stamp set. 

BLOG HOP LIST:
                                 Donna Idlet - YOU ARE HERE!

Thank you so much for stopping by! Enjoy the hop and please come back again soon!  Also, please be sure to come back tomorrow to see the entire Color by Faith Collection and all the New Background sets!!!

A Blog Named Hero - Challenge Interactive

Wednesday, June 7, 2017

Hello everyone!

I am here with A Blog Named Hero and we are collaborating this month with Chibitronics! What is Chibitronics? They’re a great company that make electronic stickers that have lights on them that allow you to incorporate technology into your cards and crafts. They are very easy to use, come with wonderful instructions, and they have amazing tutorials to help guide you to use their products.

This month challenge is "interactive", which seems to fit with the Chibitronics! If you don't have Chibitronics you can make a slider or shaker card or anything you can think of that would be interactive! I can't wait to see what you come up with.  And stop by A Blog Named Hero's blog and get more inspiration!


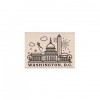
Here is my card, I am using the Hero Arts Destination stamp Washington, DC. I just had to have this stamp because I work in DC and since it is almost time to celebrate Independence Day this was the perfect stamp for and interactive card with the fireworks going off in our Nations Capital.
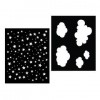
It's hard to see, but the light is on right where the fireworks are going off.


Here is a short video of the lights going on and off:


Here is how I put my card together:

1.  I cut my panel 3 7/8 x 5,
2.  I stamped the Hero Arts Destination Washington, DC stamp with versamark and heat embossed it with Hero Arts white embossing powder,
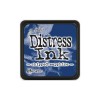
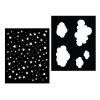
3.  I masked off the embossed image and used the Hero Arts pair sky (star) stencil to make the stars on the background.  I let that dry,
4.  I then used some distress inks to make the background.
5.  I used the pick to put small holes where I wanted my lights to shine,

6.  Then I used layed my copper tape where I needed it to connect to the battery (which is where the folded piece is),

7.  I put the lights where they needed to be (putting the negative and positive side on the correct copper tape.  After I figured out where the lights should go, I used some foam tape so I could pop the piece on my card.

Here is what it looked like after I put all the foam tape down and centered it on the stamped part of my card.  I added some adhesive and this part is ready to be put on my layer for the card.

I can’t wait to see what you create. Don’t forget to read our Challenge Rules to make sure you’re eligible to win. You can submit your project here!


Made With Love By The Dutch Lady Designs
Follow Me on Pinterest