Pages

Monday, May 30, 2022

Kat Scrappiness - Happy Belated Birthday

Hello everyone!

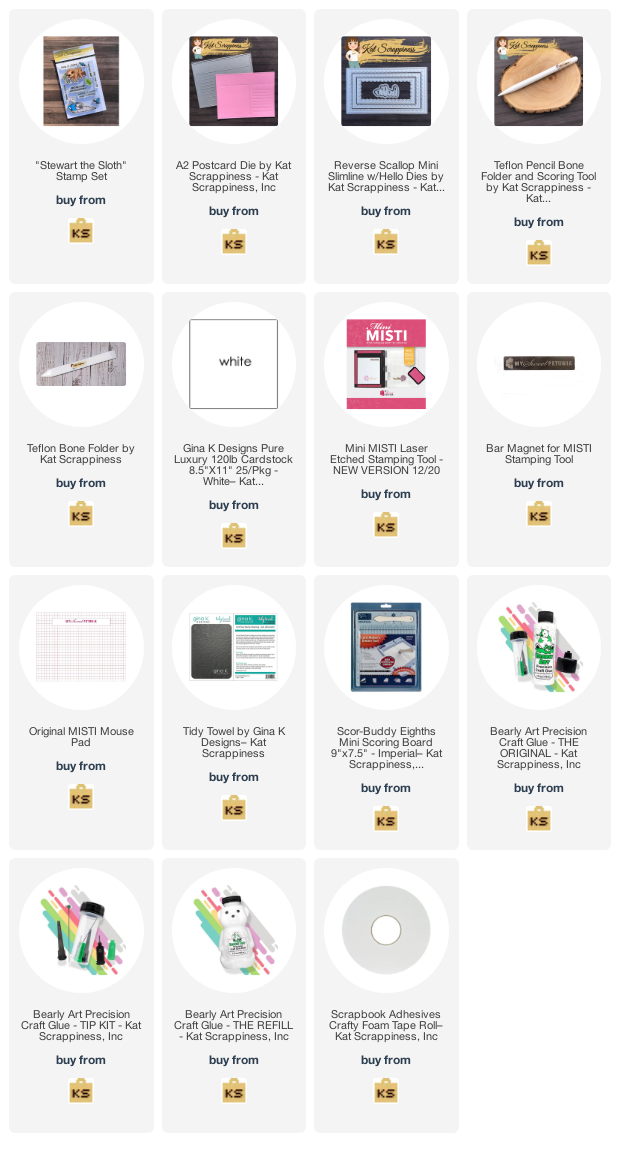
I am here with Kat Scrappiness featuring the adorable stamp set from KS called "Stewart The Sloth" Stamp Set and the A2 Postcard die.  I love how the card came together with the A2 Postcard Die as the background.


Here is how I created the card.

1. Card is an A2 size - 5 1/2 x 4 1/4 card base.

2. Die cut the Postcard die using Kraft paper, the postcard die measures 5 1/2 x 4 1/4, adhered the postcard panel onto the card base.

3. Stamped and die cut the images from the "Stewart The Sloth" Stamp Set.  Colored the images with copics and added the images onto the card.

4. Stamped the sentiment from the "Stewart The Sloth" Stamp Set in black ink.

5.  Added the "hello" from the Reversed Scallop Mini Slimline W/Hello Die set.

Thank you for stopping by, please come back again.

Here is a list of supplies I used on my card, Affiliate Links used at no additional cost. Thank you for your support. 

Friday, May 27, 2022

Maker's Movement - Summer

Hello everyone!

I am here with The Maker’s Movement with my first post on their Design Team! I am so happy to be a design team member and to be able to share with you their wonderful products. Today I am featuring the NEW Summer Sentiments Stamp & Die Set and the Flip Flop Die Set.

Here is my card for your inspiration:


Here is how I created the card:

1. Die cut the layers from the Slimline Essentials Die Set using the Crossover II die cutting machine in Kraft card stock.  Card base measures 3 1/2 x 8.

2. Die cut the flip flops from the Flip Flop Die Set using card stock from my stash, the thongs are die cut from the Maker's Movement 6x6 paper pad called Rainbow Sprinkles. Added some enamel dots on top of the flip flops.

3. Stamped and die cut the word "Summer" from the Summer Sentiments Stamp & Die Set, the thongs were die cut using the Maker's Movement 6x6 paper pad Rainbow Sprinkles.

4. Stamped the sentiment from the Summer Sentiments Stamp & Die Set and used the flag die from the  Summer Sentiments Stamp & Die Set and adhered it to the card.

5. Assembled the card and to finish it off added some enamel dots to finish off the card.

Thank you so much for stopping by, please come back again soon!


Tuesday, May 24, 2022

Retro Rubber Challenge Blog #183 - Anything Goes

Hello everyone!

I am here with Retro Rubber Challenge blog and we have a new challenge which "Anything Goes". Be sure to stop over on the Retro Rubber Challenge blog to get more inspiration, the design team has some wonderful creations!

The rules to play along with Retro Rubber Challenge is very simple, make sure the stamp you use on your project is at least one year or older. For more details on the rules, you can find them over on Retro Rubber Challenge blog.


Here is my card for your inspiration. The stamp set I used on my card is by Gina K. Designs called "Just Because"  that was released March 2020.


Here is how I put the card together:
  1. Created an A2 card measures 4 1/4 x 5 1/2.
  2. Used designer paper from 49th Market called Sherbet.  Die cut the Layers Using Gina K. Designs Master Layouts 1.
  3. Stamped the sentiment from the "Just Because" stamp set in black ink.
  4. Stamped the sentiment with versamark and added white embossing powder and heat embossed.
  5. Die cut the sentiment with a sentiment strip.
  6. Assembled the card and some rhinestones to finish off the card and finished off the card with black enamel dots.
Thank you so much for stopping by, please come back again soon!

Here is a list of supplies I used on my card, Affiliate Links used at no additional cost. Thank you for your support

Thursday, May 19, 2022

Newton's Nook Designs and Therm O Web!

Hello everyone!

This week Newton's Nook Designs and Therm O Web are partnering for a fabulous inspiration week! All week long both design teams will be sharing ways to use Therm O Web products with Newton's Nook Designs stamps! There are prizes too! Read all the way to the end of this post to find out how you can win!

I have created two cards for your inspiration:

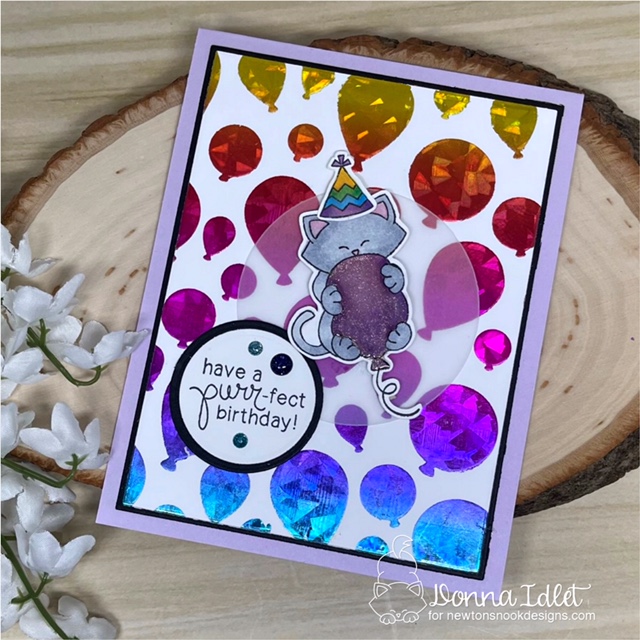
My first card I created using Newton's Birthday Bash Stamp Set and dies. This is the cutest set, it is perfect for any birthday card or to create birthday invites.

Donna Idlet Newton's Nook Designs, Newton's Balloons Stencil, Newton's Nook Birthday Bash stamp set, Mom & Dad Stamp Set, Therm o web, Deco Foils

Here is how I created it:
  • Card is an A2 measuring 4 1/4 x 5 1/2.
  • The black layer measures  3.875" x 5.125"
  • The top layer measures 3.75" x 5"
  • The top layer I used the NND Balloons Stencil, I used Deco Foil Transfer Gel Duo, I let this dry and then used Deco Foil Transfer sheets - Rainbow Shattered Glass.
  • After the Gel dried, took a  Deco Foil Craft & Carrier Sheet, the piece with the Gel on it using the Balloon Stencil and the Rainbow Shattered Glass foil (make sure the shinny side in touching the Gel) and run it through the laminator.
  • Stamped the sentiment from the Newton's Birthday Bash Stamp Set and die cut the sentiment with circle dies.
  • For finishing touches, added some enamel dots from my stash and glossy accents on the balloon.
Donna Idlet Newton's Nook Designs, Newton's Balloons Stencil, Newton's Nook Birthday Bash stamp set, Mom & Dad Stamp Set, Therm o web, Deco Foils

I love how this card turned out, it is so sparkly and cheerful, anyone would love to receive this card.

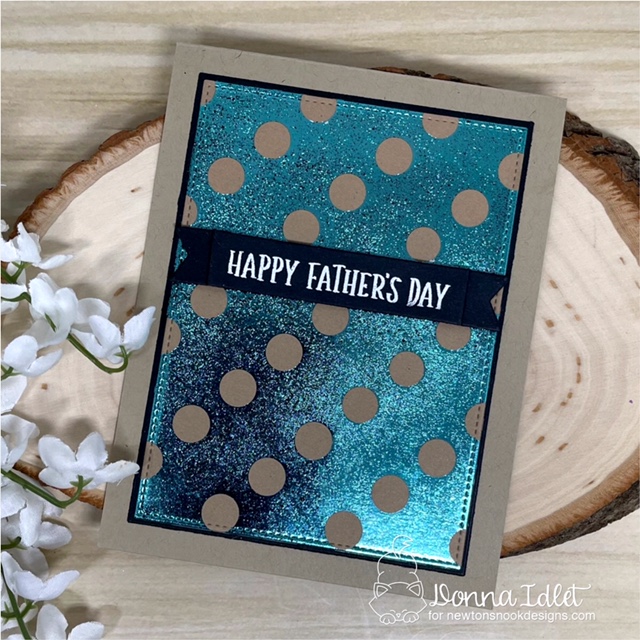
My second card, is clean and simple, but the foil makes the card so cheery!  The sentiment is from 
NND Mom & Dad Stamp Set.  This set is perfect to celebrate your mom and or dad.  

Donna Idlet Newton's Nook Designs, Newton's Balloons Stencil, Newton's Nook Birthday Bash stamp set, Mom & Dad Stamp Set, Therm o web, Deco Foils

Here is how I created the card:
  • Card is an A2 measuring 4 1/4 x 5 1/2.
  • The black layer measures  3.5" x 4.75"
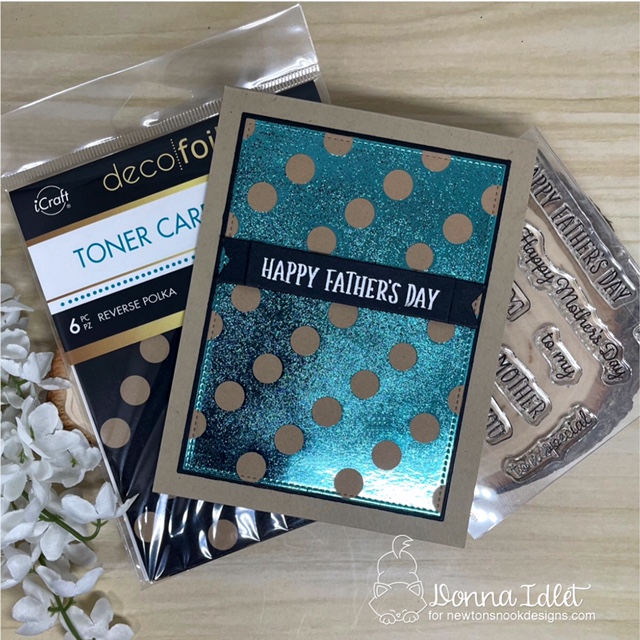
  • The top layer I used Therm o web's Deco Foil Kraft Toner Card Front - Reverse Polka, die cut it with a stitched die from my stash.
  • Used Gina K. Designs Fancy Transfer Foil - Turquoise Sea ran it through the laminator with shinny side down touching the polka dots and using the Deco Foil Craft & Carrier Sheet.
  • Stamped the sentiment from the Mom & Dad Stamp Set with versamark and heat embossed with white embossing powder on black cardstock.
  • Die cut the sentiment from NND Banner Trio Die Set.  The Banner Trio is perfect for die cutting the sentiments from the Mom & Dad Stamp Set.
Donna Idlet Newton's Nook Designs, Newton's Balloons Stencil, Newton's Nook Birthday Bash stamp set, Mom & Dad Stamp Set, Therm o web, Deco Foils

The products from Therm O Web and Newton's Nook Design was so much fun to create with.  I hope you have been inspired to try these product out for yourself.  There are more amazing projects today over on the Therm O Web blog so pop over there for more inspiration!

Would you like to win a $40 store credit Therm O Web or to Newton's Nook Designs? Visit the Newton's Nook Designs blog and the Therm O Web Blog for a chance to win! Both companies will be giving away a prize this week!

Thank you so much for stopping by, please come back again soon!

Here is a list of supplies I used on my card, Affiliate Links used at no additional cost. Thank you for your support.

Tuesday, May 17, 2022

Gina K. Designs - MAY 2022 RELEASE

Hello everyone!

I am excited to be here sharing some cards I created from the Gina K. Designs NEWLY May 2022 release, that is available NOW.  I am using the NEWLY released "Grand Gentlemen" and dies  illustrated by Beth Silaika and "Hole in One" and dies illustrated by Debrah Warner.  

You can see more inspiration from the full release on the Gina K. Designs & StampTV Friends Facebook page. To see the full release, you can go HERE under the What's New section.

I have created two cards from the Grand Gentlemen Stamp and Die Set and 1 from the Hole in One Stamp and dies Set.  

Here are my cards for your inspiration:


My first card I used the "Grand Gentlemen" and dies illustrated by Beth Silaika. This set is a great set for all the special men in your life!  There are lots of sentiments and coordinating sayings for any occasion too.  I just couldn't help myself, I had to make a rainbow card out of the ties!

Here is how I created the card:
  • Card is a slimline card, measuring  6"x 3 1/4" (6"x 6 1/2", scored at 3 1/4" on the 6 1/2" side).
  • Used the Master Layout 8 to cut the strips.  
  • Used Master Layout 7 to die cut the strips panel and the black layer.
  • Stamped and die cut the ties and colored with alcohol markers.  Added them to the card with foam squares.
  • Added the sentiment from Grand Gentlemen stamp set, die cut the sentiment from Master Layout 9.
Supplies used for this cards, Affiliate Links used at no cost to you. Thank you for your support!


My second card for your inspiration:


I created another card using the Grand Gentlemen set using Monochromatic color scheme.  The sentiment is from Hole in One Stamp Set illustrated by Debrah Warner.   
  • Card is an A2 measuring 4 1/4 x 5 1/2.
  • Used the Master Layout 8 to cut the strips.  
  • Die cut the panel and the black using Master Layouts 2.
  • Stamped and die cut the ties and colored with alcohol markers.  Added them to the card with foam squares.
  • Stamped and heat embossed the sentiment from Hole in One with white embossing powder.

Supplies used for this cards, Affiliate Links used at no cost to you. Thank you for your support!

My next card I created using the "Hole in One" and dies illustrated by Debrah Warner.  This is such a fun stamp and die set, perfect for the men in your life that loves golfing!  The set is also a great card to create the perfect Father's Day card.


Here is how I created the card:
  • Card is an A2 measuring 4 1/4 x 5 1/2.
  • Used the Master Layout 1 to cut the layers.  
  • Stamped the golf balls from the Hole in One stamp set with Embossign & Watermark ink, heat embossed with white embossing powder.  Added vellum onto of the stamped images.
  • Stamped and die cut the image from the Hole in One stamp set and colored with alcohol markers.  Added them to the card with foam squares.
  • Stamped the sentiment from the Hole in One stamped set with black ink and heat embossed with clear embossing powder. 
Supplies used for this cards, Affiliate Links used at no cost to you. Thank you for your support!

GINA K. DESIGNS MAY 2022 RELEASE 

(affiliate links used at no cost to you)

Friday, May 13, 2022

Kat Scrappiness - Rainbow Hugs

Hello everyone!

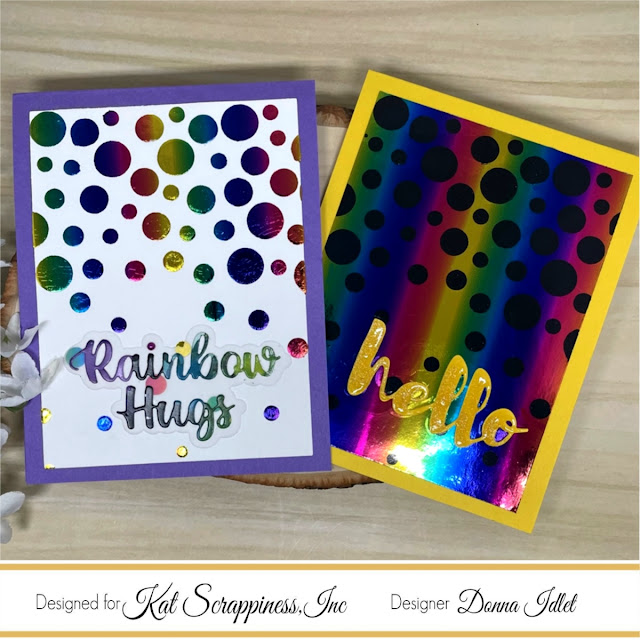
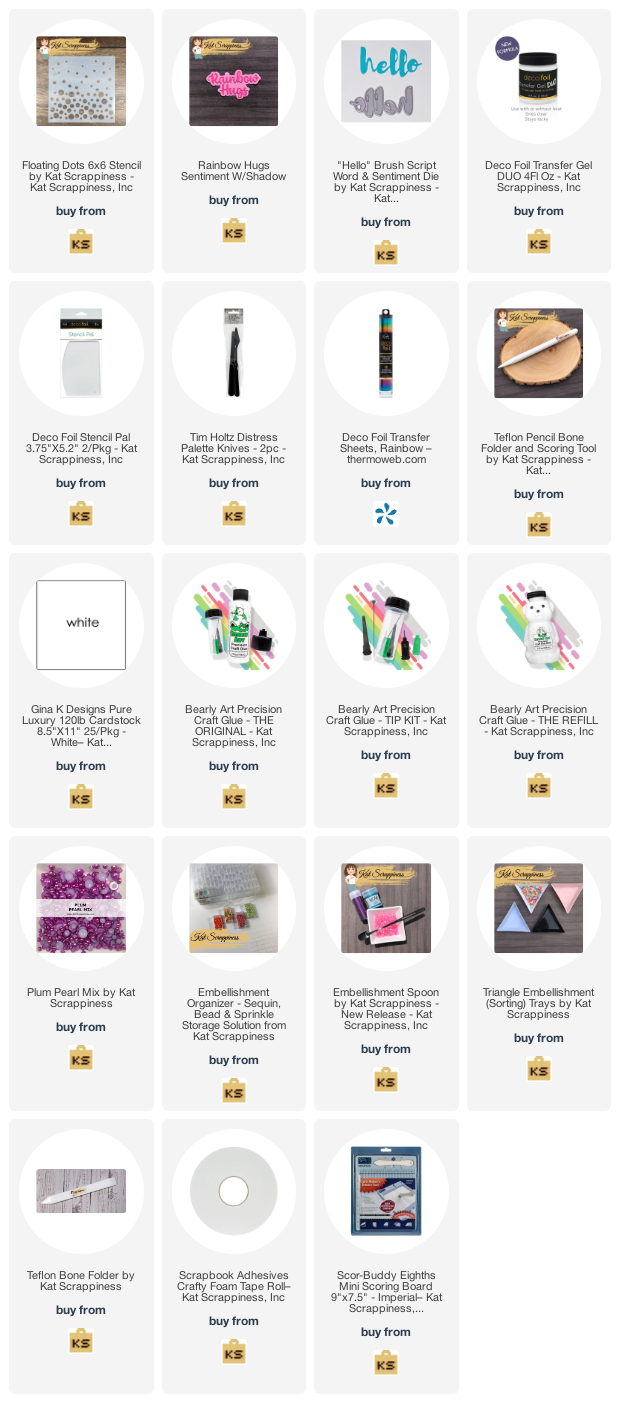
I am here with Kat Scrappiness featuring the NEWLY released "Floating Dots" 6x6 Stencil using Deco Foil Transfer Gel, Duo.  I am also using the KS Rainbow Hugs Sentiment W/Shadow and Hello Brush Script Word dies.  I have created two cards using the stencil with Deco Foil Transfer Gel Duo and foil.  


Here is my first card:

1.  A2 card measuring 4 1/4 x 5 1/2.
2.  Top layer measures 3 7/8 x 5.
3.  Added Deco Foil Gel to the stencil.
4.  Added the foil, shinny side down and ran it through the minc.
5.  Die cut the Rainbow Hugs Sentiment W/Shadow die from ink blended paper, and die cut the shadow with vellum, added a plum pearl for the tittle on the "i".
6. Assembled the card.


My second card is created using the reverse piece from the top card.  

1.  Used Thermoweb's toner paper with the reverse piece, again putting the shinny side onto the toner paper.  
2.  Ran it through the minc and adhered it to an A2 card.  
3.  Die cut the Hello Brush Script Word and adhered it to the card and added glossy accent.


Thank you so much for stopping by, please come back again soon.

Here is a list of supplies I used on my card, Affiliate Links used at no additional cost. Thank you for your support.

Tuesday, May 10, 2022

Retro Rubber Challenge Blog #182 - Flower Power

Hello everyone!

I am here with Retro Rubber Challenge blog and we have a new challenge which Flower Power, use a flower on your card.  Be sure to stop over on the Retro Rubber Challenge blog to get more inspiration, the design team has some wonderful creations!

The rules to play along with Retro Rubber Challenge is very simple, make sure the stamp you use on your project is at least one year or older. For more details on the rules, you can find them over on Retro Rubber Challenge blog.


Here is my card for your inspiration. The stamp set I used on my card is by Gina K. Designs called Better Together which is a mini stamp set that was released December 2016.


Here is how I put the card together:
  1. Created an A2 card measures 4 1/4 x 5 1/2
  2. Masked off the center and ink blended.
  3. Stamped the silhouette stamp set Better Together with black ink and stamped the sentiment from the same stamp set.
  4. Assembled the card and some rhinestones to finish off the card.
Thank you so much for stopping by, please come back again soon!

Here is a list of supplies I used on my card, Affiliate Links used at no additional cost. Thank you for your support

Friday, May 6, 2022

Newton's Nook Designs - Happy National Scrapbooking Day


Hello everyone!

Happy National Scrapbook Day! Today Newton's Nook Designs is celebrating with NEW dog and cat themed papers and dies! These new products are available NOW in their shop! Plus, there is a FLASH SALE TODAY! Save 20% off today only with code SCRAP22 at newtonsnookdesigns.com.

My first card, I am using the new cat dies with the "A Cat's Life Paper Pad". I created my card by using the Slimline Frames & Portholes Die Set and Slimline Frames & Windows Die Set. I die cut the Slimline Frames & Windows with the A Cat's Life Paper and then used some card stock for the frame. I die cut the Slimline Frames & Portholes with black cardstock. I die cut the cats from the Cat Silhouette dies in black and added them to the card. I die cut the party hats from the Balloon Shaker die set and added them to the Cat. I stamped and embossed the sentiment from the Heartfelt Meows stamp set in white embossing powder.


My next card, I created using the Dog Silhouette dies, I started by die cutting the top layer from the Frames & Flags Die Set. I inked the background with light blue ink. I then die cut the heart from the Heart Frames Die Set in rainbow colors. I used the Petite Paw Prints Stencil and added some glitter gel. I then added the newly "A Dogs Life Paper Pad" to the panel, added the heart and the dog and finished the card off by adding the sentiment from the Furr-ever Friends stamp set.


Check out the blogs of these Design Team Members for more inspiration:


Thank you so much for stopping by, please head over to the Newton's Nook Designs blog for lots of inspiration.


Thursday, May 5, 2022

Newton's Nook Designs - Happy Cinco de Meow!

Happy Cinco de Meow everyone!

I am here with Newton's Nook Designs sharing a cute card celebrating Cinco de Mayo Day!  Who is having taco's and margaritas tonight?  I am making taco's tonight, but I will pass on the margaritas (I know Newton is in a martini glass).  


Here is how I created my card:
  • Card is an A2 card which measures 4 1/4 x 5 1/2.
  • Cut the scalloped layer with NND Frames & Flag Die Set.  Ink blended the background with rainbow colors and stamped the confetti in the background and splattered some ink. 
  • Stamped the image from NND Newton Celebrates and the taco from the Newton Loves Tacos stamp sets and colored it with alcohol ink markers. 
  • Stamped and embossed the sentiment from the Newton Loves Tacos stamp set with white embossing powder, the "happy" is from the Cycling Friends stamp set, which I masked off "Birthday", die cut the sentiment using the A7 Frames & Banners Die Set.
  • Die cut the vellum in the background from the Oval Frames Die Set.
  • Assembled the card.

Thank you so much for stopping by, please come back again soon!