Pages

Saturday, December 21, 2019

Crackerbox & Suzy Stamps - Merry Christmas

Happy Holiday's everyone!

I hope everyone is ready to celebrate Christmas in four days.  I am not quite ready, but I will be on Christmas Day.  I am here with  Crackerbox & Suzy Stamp with a few of their beautiful Christmas ornaments, the first one is Ornament Round Swirl Large, the second one is Ornament Bulb Stripe, the third one is Ornament Bulb Swirl Large and the sentiment is one of my old time favorite called Merry Christmas Simple.

Here is how I put my card together:

My card is an A2 card, I wanted to use the silver background, but I wanted to also have a pop of color.  I used a die from my stash to die cut the frame.  I cut it twice, one with silver and pink glitter paper that I also had in my stash.  I adhered the frame to the base of my card.  I stamped the ornaments with versamark and embossed with silver embossing powder, I fuzzy cut the ornaments out and adhered them to my card.  The center ornament is popped up with foam tape.  I added the the  peel off stickers I have to the ornaments to look as if they are hanging.  I finished the card off by adding the sentiment Merry Christmas Simple.


Here is a closer look at my card.


The promotion for the month of December is, ALL STAMPS are 30% off! Stock up on your favorite stamps and other supplies that are in Crackerbox & Suzy Stamp.


Thanks for stopping by and have a great day!


Rinea - Just for You

Happy Holiday's everyone!

It's almost Christmas, I hope everyone that celebrates is ready and will enjoy your family this holiday season!  I am here with Rinea to share a gift idea for the holiday season or this idea can be used for any occasion.  Here are the Rinea Foiled papers I used on my project:  Rinea Ruby Starstruck Solid Pack, Rinea Silver Starstruck Solid Pack , Rinea Ruby/Gold Glossy Solid Pack and the Rinea Emerald/Gold Glossy Solid Pack.  Listed below are all the supplies I used on this project.

Here is how I put my card together.  These pillow boxes can be used to put gift cards inside, candy for favors or even jewelry as a gift.  I love how these turned out and will be great to put gifts in for the holiday season.

1.  I first die cut the pillow box with the Rinea Ruby Starstruck Solid Pack and belly band that is around the box with Rinea Silver Starstruck Solid Pack and adhered them together with some strong adhesive,


2. I then die cut the layers of the poinsettia with Rinea Ruby/Gold Glossy Solid Pack and the leaves with Rinea Emerald/Gold Glossy Solid Pack.  I then added the flower with liquid glue,


3.  I had these 3 x 3 note cards in my stash I die cut the words "just for you"  from the Rinea Ruby/Gold Glossy Solid Pack and Rinea Silver Starstruck Solid Pack and adhered it to the card.  These will be perfect to add a note to give the gift to a special person.


Here is a view just of the pillow boxes.


Thank you so much for stopping by, I wish all of you a very Merry Christmas and a Happy New Year!

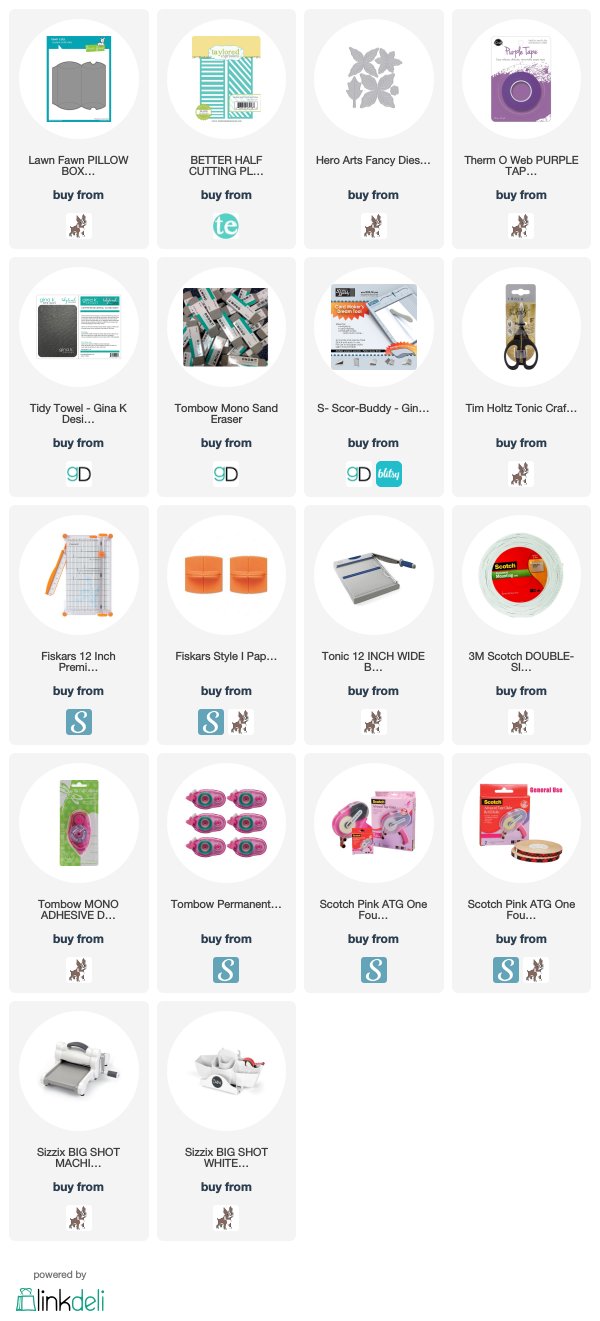
Listed below are the products I used. Click on the link to go directly to the product. Where available I have used compensated affiliate links which means if you make a purchase I will receive a small commission at no extra cost to you. Thank you so much for your support!

SUPPLIES USED:


Wednesday, December 18, 2019

Joy Clair Stamps - Merry Christmas

Happy Holiday's everyone!

I am here with Joy Clair Stamps sharing a card I created using the Joy Clair Stamps. the snowflakes are from the stamp set called "Snow Fall", the sentiment is from the stamp set called "Holly Jolly Santa".

Here is my card and how I created it.

My card is an A2 card, I cut my first layer at 4 x 5, I used versamark along the edges of the panel and added silver embossing power and heat set it.  I then stamped the snowflakes from the  "Snow Fall" stamp set with versamark, added silver embossing powder and heat set it.  The next panel which measures 3 5/8 x 4 7/8.  I also stamped the sentiment from the "Holly Jolly Santa" with versamark, added silver embossing powder and heat set it.  I then used some scissors and cut the sentiment out and added it to my card with foam squares.

Closer look at the card.


Thank you so much for stopping by, please come back again soon.


Thursday, December 12, 2019

Crackerbox & Suzy Stamps - The Color of Winter

Hello everyone!

I am here with Crackerbox & Suzy Stamps featuring some of their winter stamps which are Snow Girl WavingSnow Girl , Snowflake Trio, the sentiment is Color of Winter. The whole Crackerbox & Suzy Stamps store is 30% off for the month of December, ALSO Crackerbox & Suzy Stamps has 20% off of Copics and stencils.  

My card is an A2 card, I die cut the background layer and used some ink to ink the background.  I then die cut the snow bank the girls are standing on, I stamped the sentiment  Color of Winter and added the pink Snowflake Trio on each side. using my Mini Misti .  I adhered the snow bank to my card.  I stamped the  Snow Girl Waving and Snow Girl  and colored them with Copics (the snow girl waving I used, V06, V06 V17, C1, C3, C5, C7, E11, E13, and E15) (Snow Girl I used R81, R83, R85, C1, C3, C5, C7, E11, E13, and E15).  I used foam squares to them and added them to my card.  


Closer look at my card.


If you did not know, Crackerbox & Suzy Stamp is hosting the prize for The Flower Challenge this month and if you participate in the challenge using one of the flowers from the shop tag us using #crackerboxandsuzystamps and you will be eligible for 35% off on any of the flowers in the shop.

Again check out the great promotion for the month of December, ALL STAMPS are 30% off! Stock up on those Copics you are missing and see all the lovely stencils in the shop, everything is 30% off.  Thanks for stopping by and have a great day!


Monday, December 9, 2019

Joy Clair Stamps - Happy Holidays!

Happy Holiday's everyone!

I am here with Joy Clair Stamps sharing a card I created using the Joy Clair Stamps the trees and the sentiment came from the stamp set called "Merry Christmoose ", the birds are from the stamp set called "Noah's Ark". 

Here is my card and how I created it.

My card is an A2 card, I first masked off the moon and used distress inks on the background.   I stamped the trees and the sentiment with Versafine Clair Onyx Black.  After everything dried I sprayed the background with Sheer Shimmer Craft Spray Sparkle.


Closer look at the card.


Thank you for stopping by! Please follow Joy Clair's facebook page, Color by Faith Bible Journaling facebook page, Instagramand Twitter, be the first to hear the news, sales and giveaways! They also have a Pinterest page and Youtube channel for your inspiration!

Wednesday, December 4, 2019

Rinea - Joyous Holiday

Happy Holiday's everyone!

I am here with Rinea to share a holiday card with you.  Here are the Rinea Foiled papers I used on my card:  Rinea Copper Starstruck Solid Pack, Rinea Silver Starstruck Solid Pack , Rinea Ruby/Gold Glossy Solid Pack, and the Rinea Emerald/Gold Glossy Solid Pack.

Here is how I put my card together:

1. My card measures 5 1/2 x 4 1/4,

2. The first layer is the Rinea Copper Starstruck Solid Pack paper, which measures 5 1/2 x 4 1/4.

3. I then die cut the silver frame with Rinea Silver Starstruck Solid Pack and adhered it to the top layer using liquid glue,

 4. I then die cut the layers of the poinsettia with Rinea Ruby/Gold Glossy Solid Pack and the leaves with Rinea Emerald/Gold Glossy Solid Pack.  I put the poinsettia together with foam tape in between the layers to give it some depth.  I then added the flower to my card with liquid glue.  I colored some white pearls with a Copic marker and added them to the center of the flower. 

5.  I die cut the joy from the Rinea Ruby/Gold Glossy Solid Pack and adhered it to the card.

6.  I stamped and heat embossed the sentiment and added foam tape and adhered it to the card. 


Here is a closer look at the card.


Here is a closer look at the poinsettia and leaves, I love the details you get when you use the foiled papers on die cuts.


Thank you so much for stopping by, please come back again soon.

Listed below are the products I used. Click on the link to go directly to the product. Where available I have used compensated affiliate links which means if you make a purchase I will receive a small commission at no extra cost to you. Thank you so much for your support!

SUPPLIES USED:


Tuesday, December 3, 2019

RETRO RUBBER CHALLENGE BLOG #124 - Christmas Is All Around

Happy Holiday's everyone!

I am here with Retro Rubber Challenge blog and we have a new challenge, which is Christmas is All Around.  I feel like Christmas is all around too, this is my favorite time of year.  I love decorating and spending time with my family.  I wish all of you who celebrate a Merry Christmas.

If you have not joined our challenges before, the rules are very simple, just use a stamp older than a year and you must include the age (or approximate age) of the stamp in your blog post. I cannot wait to see you take on it.


Here is my card and how I created it:

The stamp I used is from Gina K. Designs and is from the stamp set called "Noel" it was released in October 2016. 

My card is an A2 card, the DSP is cut at 4 x 5 1/4, I die cut a circle and stamped the sentiment.  I die cut two fishtail and added it to the circle and adhered it to my card.  Quick and simple. 


Thank you so much for stopping by, I hope you will play along with the Retro Rubber Challenge Blog.

Monday, December 2, 2019

CRACKERBOX & SUZY STAMPS - Snowflakes and Friendship

Hello everyone!

I am here with Crackerbox & Suzy Stamps featuring a couple of their stamps which are Snowflake Large and the sentiment is called Snowflakes and Friendship. The whole store is 30% off for today and tomorrow (Dec 2-3), so get your wish list out and shop away before the sale ends.  Free shipping with a $25 order for the US and $35 for International.


My card is an A2 clean and simple card, I cut my first layer at 4 x 5 1/4, I used a mask and inked the center of the layer.  I then stamped the Snowflake Large image on each corner of the masked area.  I then stamped the Snowflakes and Friendship.  I added some rhinestones and nuvo drops on the image and colored in the stars with a copic marker to finish off the card.

Closer look at my card.


Thank you so much for stopping by, please come back again soon.